Integration
Website Integration
Option 1 - Automatic Single-Click integration:
-
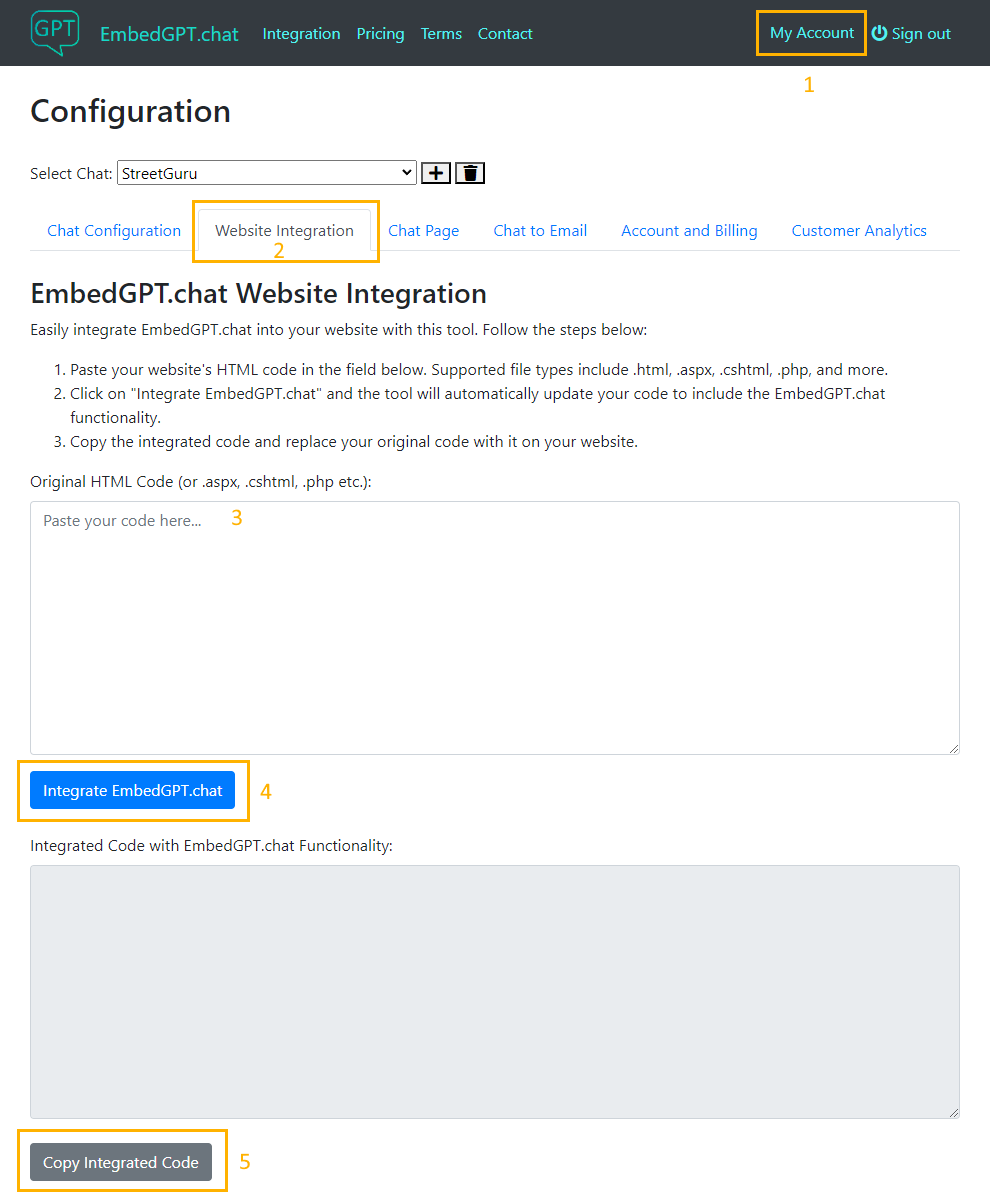
Go to "My Account".
-
Select the "Website Integration" tab.
-
Copy your page HTML (or cshtml, php, etc.) and click the "Integrate EmbedGPT.chat" button.
-
Copy the updated page with the chat integration back into your website.
:

Option 2 - Using JS added to your website:
-
Add this at the bottom of the body element of your HTML page:
<script type="module">
import {initEmbeddedChat} from 'https://unpkg.com/embeddedaichatux@latest/EmbeddedChat.js';
document.addEventListener('DOMContentLoaded', function () {
    initEmbeddedChat(null, 'CHAT ID from the bottom of Website Integration tab on https://embedgpt.chat/Account page');
});
</script>
WordPress Integration
Option 1 - Wordpress Plugin:
- Download the Wordpress.EmbedGPT Plugin
- In the WP admin menu, click on Plugins => Add Plugins
-
Select Choose File, select Wordpress.EmbedGPT.zip, and click Install Now

- Click Activate Plugin
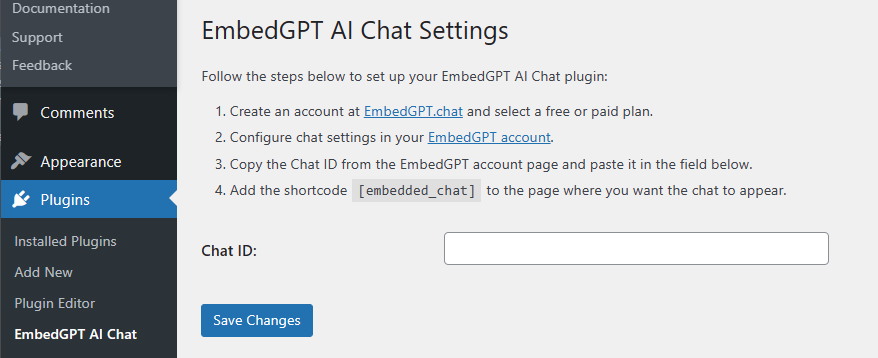
- EmbedGPT AI Chat will show up in the list of plugins
-
Click on Settings link under the plugin

-
Follow the instructions on the plugin Settings page for configuration

Option 2 - Copy and paste the code:
-
Firstly, you need to install the "Header and Footer Code" plugin. You can download it from the official WordPress repository at https://wordpress.org/plugins/head-footer-code/. After downloading, install and activate the plugin from your WordPress dashboard.
-
Go to the settings of the "Header and Footer Code" plugin. You will see different sections to inject codes to Header, Footer, etc.
-
Copy the following code block and paste it in the body section:
<style> document.addEventListener("DOMContentLoaded", () => { new EmbeddedChat(null, 'REPLACE WITH CHAT ID from https://embedgpt.chat/Account page'); }); </script> -
Click "Save" to save the widget settings.
-
Refresh your WordPress site. The Embedded Chat should now be visible on your site.